Easy Foil Nail Tutorial - Wet Nails/Lava Nails/Really Cool Nails
Wednesday, April 03, 2013
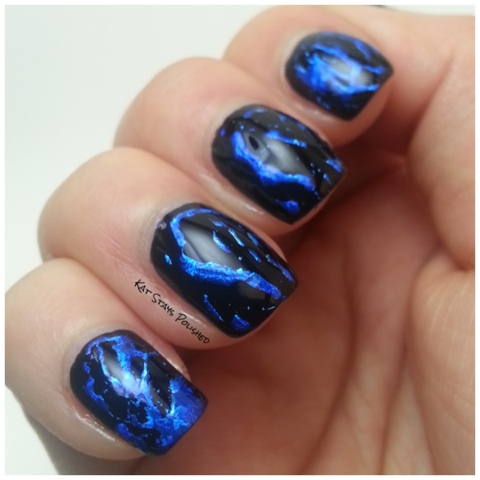
Finally! I used the nail foil that I won from It's So Easy Nails Art a couple of weeks ago. This was the first time I'd ever tried it and I really love them.
I was not going for a full nail effect which is why I painted my nails a solid color first.
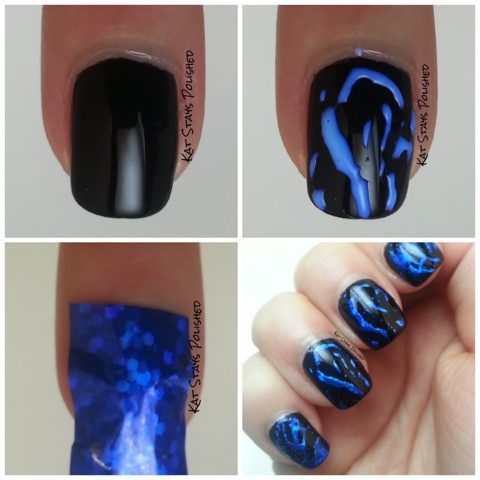
- Paint Nails with a glossy black. I used JulieG Black Sheep. Top it off with one layer of Seche Vite or your favorite top coat.
- Use the foil glue and paint it on your nail. Because you have a glossy surface, it's going to look just the way it does in the 2nd step picture. Use your brush to move the glue around until you are satisfied.
- When the glue is dry and clear, cut off a piece of the nail foil and cover your entire nail pressing down firm enough that the foil sticks.
- Gently remove the foil and go over any bare spots you might have. Add one more layer of top coat and you're done!
I really love the way these turned out. Have you tried nail foils before?


4 comments
This looks really beautiful. I can never get foils to turn out so well one me.
ReplyDeleteI have had lots of foils, but never had any decent results until lately. I found that you can skip the glue and just use a polish tacky dry.
I may try that. Since I have the glue I'll use it, but when I run out, I'm sure I'll try alternative methods. =)
DeleteWOW! These are gorgeous! I've not seen a nail foil design I liked yet, but that seems to have tipped the scale for me *__*
ReplyDeleteGreat tutorial and design!! Must try foil :D x
ReplyDelete